Ever stared at your forearms and thought, why aren’t they as ripped and veiny as I want them to be? If you’ve been wondering how to use a forearm gripper to build forearms that catch attention, you’re in the right place.
Whether you’re tired of weak grip or just want those muscular forearms, I get it.
It can feel frustrating when results seem out of reach, but trust me, you’re closer than you think.
Here’s how to use a forearm gripper: Grab the gripper, position it in your hand, and squeeze until the handles almost touch. Hold for a second, then release. That’s it.
In this guide, we’ll break down the exact techniques, tips, and tricks to take your forearms from average to impressive.
Ready to level up your grip strength?
Let’s get started.
How to Use a Forearm Gripper Step by Step
To use a forearm gripper properly, follow these steps to improve grip strength, build forearm muscles, and enhance overall hand endurance.
Step 1: Choose the Right Gripper
Before you even start, you’ve got to pick the right tool.
Grippers come in different resistance levels, ranging from easy to crush to nearly impossible to close.
If you’re a beginner, it’s tempting to go for the toughest one, but that’s a rookie mistake.
Instead, start with a gripper you can close but still feel challenged by.
You want resistance, not frustration.
As you build strength, you can graduate to heavier levels.
Step 2: Proper Hand Placement
Place the gripper handle at the base of your fingers, not in the center of your palm.
If the gripper is too far back, you won’t activate the right muscles, and it’ll just feel awkward.
The lower handle should rest just under your fingers, and your thumb should wrap around the top handle.
You want to feel a solid grip, like the tool is an extension of your hand.
Step 3: Squeeze and Release
This is the moment of truth.
Squeeze the handles together with slow, controlled pressure until they’re about to touch. Hold it for a second, then slowly release.
Notice how your forearm burns a bit as you release—that’s the feeling you’re after.
The goal isn’t to rush through reps. Slow, deliberate movements build that strength and endurance.
Step 4: Reps and Sets
How many reps should you do?
Start with 10-15 reps for each hand, aiming for 2-3 sets.
Once you can handle that easily, increase the reps or move to a gripper with more resistance.
But listen to your body—fatigue should be a sign you’re working hard, not about to hurt yourself.
Step 5: Rest and Recovery
After each set, give your forearms a break.
Rest is crucial because overuse can lead to injury.
If your hands start cramping or your forearms feel stiff, it’s a sign to back off.
Give yourself at least 24-48 hours between sessions to let those muscles recover and grow.
Best Forearm Gripper Exercises to Build Strength
Best Forearm Gripper Exercises to Build Strength involve more than just squeezing.
These exercises target different forearm muscles, helping you avoid plateaus and improve grip strength more effectively.
Exercise 1: Standard Squeeze
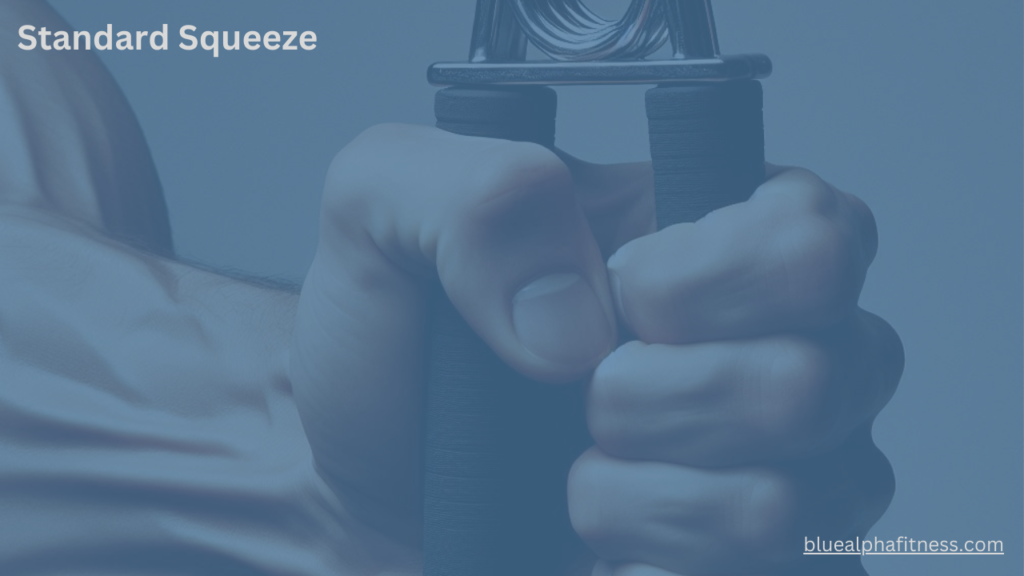
The standard squeeze is your bread and butter.
With the gripper in hand, simply squeeze the handles together and release. This works the bulk of your forearm muscles, including the flexors.
Perform 10-15 reps on each hand.
The beauty of this move is in its simplicity.
You can do it almost anywhere—while watching TV, waiting in traffic, or even during a break at work.
Exercise 2: Overhand Grip
Switch things up by turning the gripper upside down. Hold the gripper with an overhand grip (thumb on the bottom), squeeze as usual.
This targets different muscle groups, mainly the extensors, which are often underworked.
This move helps balance your grip strength, making your entire forearm stronger and more stable.
Exercise 3: Time Under Tension
Here’s where things get interesting.
Instead of cranking out fast reps, try holding the gripper closed for a set amount of time.
Start with a 5-second hold and build up from there.
This technique—called “time under tension”—forces your muscles to work harder and increases endurance.
The longer you hold, the more burn you’ll feel. Think of it like a plank for your forearms.
Exercise 4: Reverse Grip Squeeze
Flip the gripper again, but this time, use a reverse grip where your fingers pull the handles toward your palm, focusing on those lesser-used muscles.
This exercise helps you build all-around grip strength and prevents muscle imbalances, which could lead to injury.
Exercise 5: Finger Tip Squeeze
For this one, you’ll use just the tips of your fingers to squeeze the gripper.
By isolating your fingertips, you’re engaging muscles deep in your forearms and strengthening your grip in a way that’s directly applicable to tasks like climbing or holding onto heavy weights.
This move can be deceptively tough, but the payoff is worth it.
How Often Should You Use a Forearm Gripper?
You should use the forearm gripper in a balanced way to avoid undertraining or overtraining.
The optimal frequency depends on your goals, ensuring you build strength without risking injuries.
Let’s break down the ideal usage for maximum results.
1. Daily vs. Weekly Use
If you’re just starting, aim to use the gripper 2-3 times a week. That’s enough to build strength without pushing your muscles to the point of fatigue.
Once you’ve got a groove going, you can increase the frequency.
Some people swear by using it daily, but that can lead to overuse injuries, especially if you’re not giving your muscles enough recovery time.
2. Balance Volume and Recovery
Your forearms need rest just like any other muscle group.
It might be tempting to squeeze away every day, but rest is where the magic happens. Your muscles need time to recover and build strength.
If you notice soreness lingering longer than usual, or your performance is dipping, that’s your body telling you to back off.
You don’t want to mess around with overtraining—especially with smaller muscles like those in your hands and forearms, which can take longer to recover.
3. Signs You’re Overtraining
Overtraining can sneak up on you.
If you feel constant soreness, sharp pains, or a lack of progress even though you’re working hard, that’s a big red flag.
Another common sign is a weak grip during workouts, like struggling to hold onto a dumbbell.
If any of this sounds familiar, scale back and let those muscles heal.
Benefits of Using a Forearm Gripper for Strength and Muscle Growth
The benefits of using a forearm gripper for strength and muscle growth include better grip strength, enhanced muscle definition, injury prevention, and improved workout performance.
Let’s explore how this simple tool delivers big results.
1. Increases Grip Strength
Grip strength isn’t just about your hands.
It plays a massive role in nearly every exercise that involves holding weight, from deadlifts to pull-ups.
A stronger grip means you can hold heavier weights, do more reps, and ultimately, get stronger all over.
If you’ve ever had to cut a set short because your grip gave out before your muscles did, you know exactly how frustrating that is.
Forearm grippers directly tackle that weak link.
2. Enhances Muscle Definition
Want those veins to pop?
A forearm gripper works the flexor and extensor muscles, which are responsible for giving your arms that “ripped” look.
The more you use them, the more defined those muscles get.
It’s not just about getting stronger—it’s about looking good too.
You’re building endurance and getting that muscle separation that makes your forearms stand out.
3. Prevents Injury
Think about how often you rely on your grip—whether you’re lifting weights, carrying groceries, or simply opening a jar.
Strengthening your forearms with a gripper can help prevent injuries in your wrists, hands, and even elbows.
Weak grip strength can lead to imbalances that put strain on your joints, making you more susceptible to sprains or strains.
Strengthening those muscles makes you more resilient to everyday tasks and workouts alike.
4. Better Performance in Other Workouts
Forearm strength isn’t just for show.
Improving your grip enhances your performance in major compound movements like deadlifts, rows, and pull-ups.
When your grip is stronger, you can hang onto the bar longer, complete more reps, and lift heavier weights.
It’s the ultimate trickle-down effect: strengthen your grip, and everything else starts to improve too.
Common Mistakes to Avoid When Using a Forearm Gripper
The common mistakes to avoid when using a forearm gripper include starting with too much resistance, poor hand positioning, and overtraining.
Let’s break down how to avoid these pitfalls for better results.
1. Using Too Much Resistance Too Early
One of the biggest mistakes people make is grabbing the toughest gripper right off the bat.
You might think you’re proving how strong you are, but in reality, you’re just setting yourself up for failure.
When the resistance is too high, you won’t get a full range of motion, which means you won’t activate the muscles properly.
Start with a gripper you can close comfortably, and work your way up.
2. Incorrect Hand Positioning
It’s easy to get lazy with form, especially when you’re doing something that seems simple.
But where you place the gripper in your hand matters.
If it’s too far back in your palm, you’re not engaging the right muscles. Instead, you’re just grinding through reps inefficiently.
Focus on keeping the handle just under your fingers for maximum activation.
3. Overtraining and Muscle Fatigue
Squeezing a gripper feels good—it’s addictive even. But that can be a trap.
It’s easy to overtrain your forearms, which can lead to fatigue, soreness, and even injury.
Like with any muscle group, your forearms need rest.
If you’re feeling pain or tightness, that’s a signal to pump the brakes.
How to Combine Forearm Gripper Workouts with Other Exercises
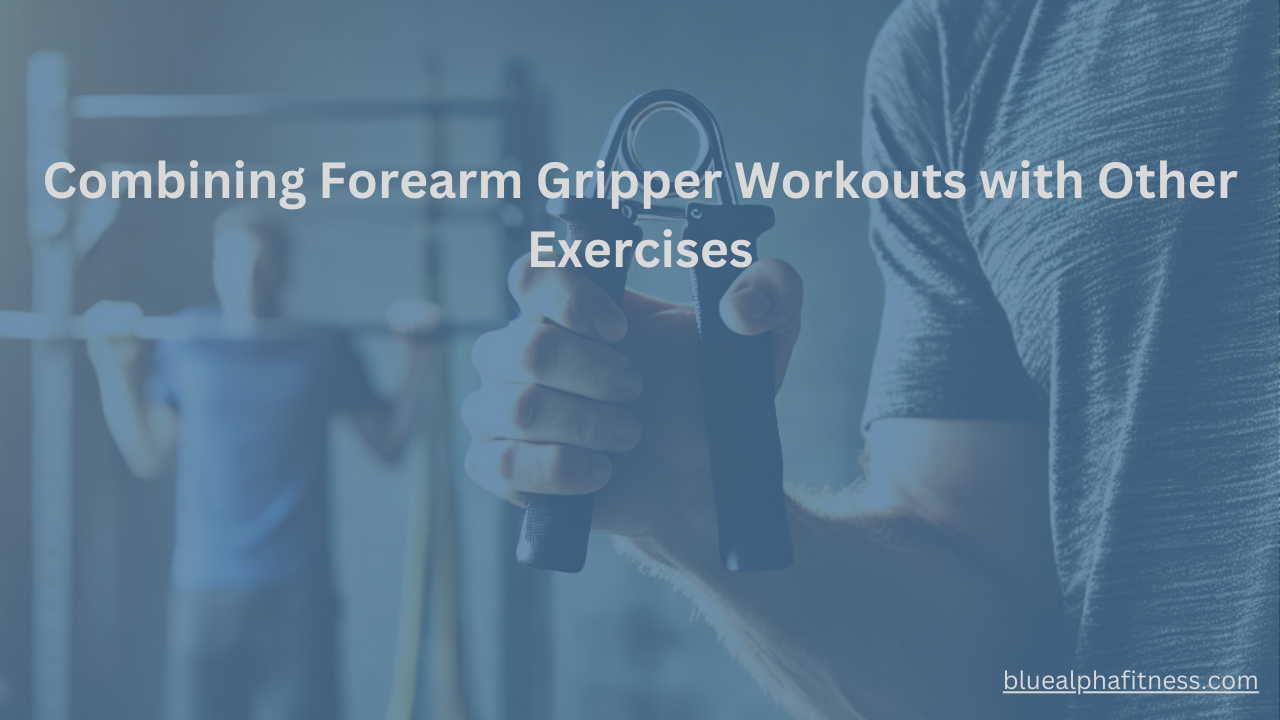
Forearm grippers are great on their own, but they’re even more effective when combined with other exercises.
By working your grip alongside compound movements, you’ll see faster strength gains and more overall muscle development.
1. Combine with Deadlifts
Deadlifts are a grip killer.
As the weight gets heavier, your forearms are often the first to give out. That’s where forearm grippers come in.
By strengthening your grip with the gripper, you’ll be able to hold onto the bar longer and lift heavier weights.
Try alternating gripper workouts on off-days from your deadlifts to give your forearms the extra boost they need.
2. Add to Your Pull-Up Routine
Pull-ups are another grip-heavy exercise.
Incorporating forearm gripper training into your routine will improve your grip endurance, meaning you’ll be able to hang onto the bar for longer sets.
If you struggle to hit higher reps, focus on forearm strength during your off days, and watch how your pull-up numbers improve.
3. Superset with Dumbbell Holds
A great way to finish your workout is by adding some static holds with dumbbells.
Grab a pair of heavy weights and simply hold them by your sides for as long as you can.
This mimics the same kind of grip endurance that the forearm gripper targets, and when you
superset the two exercises, you’re building strength and endurance at the same time.
What Forearm Gripper Resistance Level is Best for You?
Choosing the right resistance level for your forearm gripper can be the difference between solid gains and frustrating stagnation.
Here’s how to pick the best level based on your current strength and fitness goals.
1. Beginner Levels
If you’re just starting out with forearm training, ease into it.
Beginners should stick to lower resistance levels, typically between 50 to 100 pounds of pressure.
Why? Because you’re still building foundational strength, and starting too heavy can lead to bad form or even injury.
Think of it as mastering the basics before jumping into the deep end.
At this level, the focus is on getting your grip endurance up and learning the proper technique without overloading your muscles.
2. Intermediate Levels
Once you’ve mastered the beginner stage and feel confident squeezing through those lighter reps, it’s time to level up.
For those in the intermediate range, aim for 100 to 200 pounds of resistance.This is where you’ll start noticing more muscle definition and strength.
Your forearms will feel stronger, and you’ll be able to hold onto weights longer during workouts.
If you’re looking to build muscle mass and not just endurance, this is your sweet spot.
You’ll see your grip translating into improved lifts on movements like deadlifts, pull-ups, and rows.
3. Advanced Levels
For the experienced strength trainer or bodybuilder, it’s all about pushing your limits.
Advanced users should go for resistance levels upwards of 200 pounds, with some grippers going as high as 350 pounds.
At this stage, you’re not just looking for endurance; you’re aiming for serious strength gains and those thick, veiny forearms that scream power.
With these heavier grippers, be prepared to perform fewer reps and increase your rest time.
You’ll need to incorporate these sessions wisely into your routine to avoid burnout or injury, but the payoff will be massive.
How Long Does It Take to See Results with a Forearm Gripper?

How long it takes to see results with a forearm gripper depends on your consistency.
Short-term gains can appear within weeks, while significant muscle growth may take several months.
Factors like diet, genetics, and training frequency are crucial.
Let’s break it down:
1. Short-Term vs. Long-Term Gains
If you’re consistent, you’ll likely start noticing short-term gains within 2-4 weeks.
Your grip will feel stronger, and daily tasks like carrying groceries or holding weights in the gym will become noticeably easier.
However, for visible, long-term muscle growth, you’re looking at 3-6 months of consistent use.
Remember, forearm muscles are smaller than other muscle groups, so while they can get stronger quickly, visible definition takes time and effort.
2. Factors That Influence Progress
Several variables can influence how fast you’ll see progress.
Frequency of training is a big one—training your forearms two to three times a week will yield faster results than once a week.
Your diet plays a role too—fueling your muscles with enough protein will speed up recovery and growth.
And of course, there’s genetics. Some people naturally develop forearm muscles faster than others.
Focus on your own progress instead of measuring yourself against others.
3. Realistic Expectations
Set realistic expectations to avoid disappointment.
Sure, you want those veiny, ripped forearms now, but they won’t appear overnight. Success comes down to consistency.
In the first month, you’ll feel stronger. By month three, you might start seeing more definition.
By month six, those veins will be popping.
The key is to stick with it, trust the process, and give your forearms time to adapt to the work you’re putting in.
FAQs on How to Use a Forearm Gripper Effectively: Your Top Questions Answered
Now that you understand how to use a forearm gripper effectively for stronger, more defined forearms, let’s dive into your most important questions to ensure you get the best results from your training.
1. Are grippers good for forearms?
Yes, grippers are excellent for targeting and strengthening the forearm muscles. They provide a focused workout that enhances grip strength and endurance.
2. Do grippers increase forearm veins?
Yes, using grippers can help increase forearm veins. As you build muscle and reduce body fat, your veins may become more prominent, leading to that desired vascular look.
3. Do forearm grippers actually work?
Yes, forearm grippers do work effectively for improving grip strength and muscle endurance. Consistent training with them leads to noticeable gains in forearm strength.
4. Which grip is best for forearms?
The best grip for forearms is typically a crushing grip, where you squeeze the gripper handles together. This grip specifically targets the forearm flexors and helps build overall grip strength.
5. How to bulk up forearms?
To bulk up your forearms, incorporate progressive resistance training with grippers while ensuring you consume enough calories and protein to support muscle growth. Aim for higher resistance and lower reps to stimulate hypertrophy.
6. Can I use forearm grip every day?
Yes, you can use a forearm gripper every day if you listen to your body and manage fatigue. However, alternating intensity and allowing recovery days may enhance results.
7. How often should I train my forearms with grippers for best results?
You should train your forearms with grippers 2 to 4 times per week for optimal results. This frequency allows sufficient recovery while promoting muscle growth.
8. How long does it take to build forearms with a gripper?
It takes about 4 to 6 weeks of consistent use to start seeing noticeable improvements in forearm size and strength with a gripper. Regular training will help you develop muscle and endurance over time.
9. Can using a forearm gripper help with lifting heavier weights?
Yes, using a forearm gripper can help improve your grip strength, which is crucial for lifting heavier weights. A stronger grip translates to better performance in compound lifts.
10. Do forearm grippers help prevent wrist injuries?
Yes, forearm grippers can help prevent wrist injuries by strengthening the muscles around the wrist joint. A stronger grip stabilizes the wrist during various movements.
11. Is it normal for my forearms to feel sore after using a gripper?
Yes, it’s normal for your forearms to feel sore after using a gripper, especially if you’re new to the exercise. Soreness indicates that your muscles are adapting and getting stronger.
12. What are the signs that my forearm grip strength is improving?
Signs that your forearm grip strength is improving include increased repetitions or resistance on your gripper, enhanced performance in other exercises, and reduced fatigue during gripping tasks.
13. Do forearm grippers help with sports like climbing or tennis?
Yes, forearm grippers can significantly benefit sports like climbing or tennis by improving grip strength and endurance. A strong grip is essential for performance in these activities.
14. What is the best time to use hand gripper?
The best time to use a hand gripper is when you can incorporate it into your regular workout routine, ideally after your primary lifts. This timing allows you to focus on grip strength without compromising your main exercises.
15. How do you use hand grips for beginners?
To use hand grips as a beginner, start with a lower resistance level and perform 3 sets of 8 to 15 repetitions, squeezing the gripper fully. Focus on maintaining good form and control during each rep.
16. How many hand grips should I do a day?
You should aim for 3 to 5 sets of hand grips per day, depending on your fitness level. Adjust the number based on your comfort and ability to recover.
17. What are the disadvantages of hand grippers?
Disadvantages of hand grippers include the potential for overuse injuries if used excessively and limited range of motion compared to other grip-strengthening exercises. Proper technique and variety are essential.
18. Which hand gripper is best for beginners?
The best hand gripper for beginners is typically a light to medium resistance gripper that allows for controlled squeezing without straining. Look for adjustable options to grow with your strength.
19. How many minutes should I use hand grippers?
You should use hand grippers for about 10 to 15 minutes per session, depending on your sets and rest periods. This duration is sufficient to challenge your grip without causing excessive fatigue.
20. What is the best position for hand gripper?
The best position for using a hand gripper is seated or standing with a straight back, ensuring that your grip is firm and aligned with your forearm. Maintain a relaxed posture to prevent tension in other areas.
Ready to Master How to Use a Forearm Gripper? Let’s Make It Happen.
Maybe you’re looking at that forearm gripper in your hand, wondering if it’s really going to give you those veiny, ripped forearms you’ve always wanted.
Maybe you’re even a little frustrated, thinking, “Is this really all it takes?”
Hey, we’ve all been there.
The truth is, small steps lead to big results. That simple tool you’re holding is the key to transforming not just your grip, but your entire arm strength.
You’ve learned the moves, the right technique, and how to avoid mistakes. You know what muscles you’re working and how often to train.
Now it’s time to put it all into action.
Each squeeze gets you closer to those visible veins, that defined muscle, and the grip strength that’ll make your workouts even stronger.
You’ve got this. Stay consistent, trust the process, and let your hard work show
You’re one step closer to becoming a grip master. Let’s go!