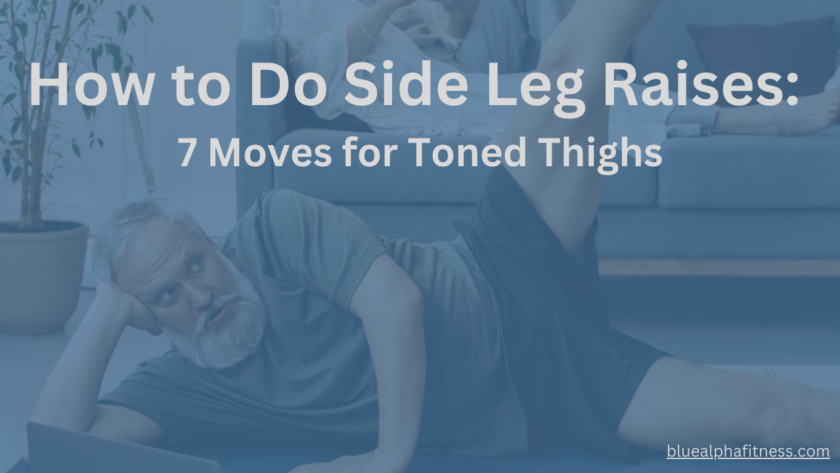
How to do side leg raises properly—sounds simple, right? But if you’ve ever felt like you’re just swinging your leg around with no real effect, you’re not alone.
It’s frustrating to put in the effort and not feel the burn where you should.
Maybe your balance is off, your form feels awkward, or you’re wondering if you’re even targeting the right muscles.
Here’s how to do side leg raises correctly: Keep your core tight, move with control, and engage the right muscles—no more random leg flailing. When done right, they fire up your hip abductors, strengthen your glutes, and sculpt lean, toned legs.
This guide will break it all down—proper form, common mistakes, and variations to step up your game.
No more guesswork. No more wasted reps. Just simple, effective moves that actually work.
Let’s get into it.
How to Prepare for Side Leg Raises: Essential Gear and Warm-Up Tips
Before diving into side leg raises, let’s talk about getting ready.
Preparation is key to maximizing your workout and avoiding injury.
Think of it as the appetizer before the main course – you wouldn’t want to skip it!
1. Equipment Needed
First things first, grab your gear. Here’s what you’ll need:
- Exercise Mat: This provides a comfortable and supportive surface. It cushions your joints and keeps you stable.
- Optional: Resistance Bands or Ankle Weights: These add intensity. They help you build strength faster and make the workout more challenging.
Imagine trying to do leg raises on a hard floor – ouch, right? That’s why the mat is non-negotiable.
And those bands or weights? They’re like adding spice to a dish – they elevate everything.
2. Warm-up Exercises
Skipping the warm-up is a rookie mistake. Warming up prepares your muscles and prevents injury.
Here are a couple of simple, effective warm-up exercises:
- Light Cardio: Do some jumping jacks or take a brisk walk. This gets your blood pumping and muscles ready. Picture it as waking your body up from a nap – you need that energy flowing!
- Dynamic Stretches: Try leg swings and hip circles. These movements increase your range of motion. Think of them as oiling the gears before they start spinning.
Proper Form and Technique for Side Leg Raises
Now, let’s get into the nitty-gritty – form and technique.
Proper form is crucial. It’s the difference between sculpting those thighs and wasting your time.
Basic Positioning
Here’s how to nail the basic position:
- Lie on Your Side on the Mat: Start by lying on your side, legs stacked, body in a straight line. Your head, shoulders, hips, and feet should align perfectly. Imagine a ruler along your side – that’s the alignment you want.
- Align Your Body: Keep your head resting on your lower arm and your upper hand on the floor in front of you for balance.
- Engage Your Core: Tighten your abdominal muscles. This supports your back and ensures your movements are controlled.
Common Mistakes to Avoid in Side Leg Raises for Better Results
Nobody’s perfect, but let’s avoid these common pitfalls:
- Arching the Back: Keep your back straight. Arching can lead to pain and reduces the effectiveness of the exercise.
- Swinging the Leg: Control is key. Swinging might feel easier, but it’s the slow, controlled lifts that build muscle.
- Not Engaging the Core: Without a tight core, you risk straining your back. Engage those abs to protect your spine.
The 7 Best Side Leg Raise Variations and How to Do Them
Ready to get those thighs burning?
Here are seven moves that will do the trick.
1. Standard Side Leg Raise
This is the bread and butter of side leg raises. Simple but effective.
a) Starting Position: Lie on your side, legs straight. Align your body as described earlier.
b) Movement: Lift your top leg up as high as you can, then slowly lower it back down. Keep it controlled.
c) Sets and Reps: Aim for 3 sets of 15 reps on each side.
2. Side Leg Raise with Resistance Band
Want to turn up the heat? Add a resistance band.
a) Position the Band: Place the band just above your knees.
b) Execution: Lift your top leg against the band’s resistance. You’ll feel the burn quicker.
c) Sets and Reps: Do 3 sets of 12 reps. The band makes it tougher, so fewer reps are fine.
3. Side Leg Raise with Ankle Weights
Ankle weights add another layer of difficulty.
a) Use Ankle Weights: Strap them on securely.
b) Execution: Perform the leg raise as usual. The added weight makes each lift more challenging.
c) Sets and Reps: Start with 2 sets of 10 reps, working up to 3 sets as you get stronger.
4. Standing Side Leg Raise
This variation also works on your balance.
a) Starting Position: Stand with feet hip-width apart. Use a chair or wall for support to maintain balance.
b) Movement: Lift one leg out to the side, keeping it straight. Lower it slowly.
c) Sets and Reps: Try 3 sets of 15 reps on each side.
5. Side Leg Raise on All Fours
This move hits your glutes and thighs.
a) Starting Position: Get on your hands and knees, Keep your back flat.
b) Movement: Lift one leg out to the side, keeping the knee bent. Lower it slowly.
c) Sets and Reps: Do 3 sets of 12 reps on each side.
6. Side Leg Circles
Add some variety with leg circles.
a) Starting Position: Lie on your side as usual.
b) Movement: Lift your top leg slightly and make small circles. Switch direction after each set.
c) Sets and Reps: Aim for 3 sets of 10 circles in each direction.
7. Clamshell Exercise
This one’s a killer for the outer thighs.
a) Starting Position: Lie on your side, knees bent at 90 degrees.
b) Movement: Keeping your feet together, lift your top knee as high as you can, then lower it. Imagine a clamshell opening and closing.
c) Sets and Reps: Do 3 sets of 15 reps.
After you finish your preferred side leg raise exercise, it’s important to cool down. This brings us to our next part.
Cool Down and Stretch After Side Leg Raises: Unlock Faster Recovery and Flexibility
Cooling down is as important as warming up. It helps your muscles recover and reduces soreness.
· Importance of Cooling Down
A gradual cool-down helps ease your heart rate and loosen your muscles. Skipping it can lead to stiffness and prolonged recovery.
· Effective Cool down Stretches
Here are a few stretches to include, each performed for 30 seconds to 1 minute:
- Gentle Leg Stretches: Sit on the floor with legs extended. Reach forward to touch your toes, feeling a stretch in your hamstrings.
- Hip Flexor Stretches: Kneel on one knee, the other foot in front. Push your hips forward gently to stretch the hip flexor of the kneeling leg.
- Hamstring Stretches: Stand and bend forward at the hips, reaching towards your toes. Keep your legs straight to feel the stretch in your hamstrings.
Now that you’ve stretched out those muscles, let’s dive into some additional tips for getting the most out of your workout.
Tips to Maximize Your Side Leg Raise Results
To maximize your side leg raise results, consistency and smart progression are key—combine your efforts with proper nutrition, rest, and gradual intensity for the best outcome.
Let’s break down the steps to help you get there.
1. Stay Consistent
Stick with your routine. Doing these exercises regularly is crucial.
Think of it like brushing your teeth – daily habits make a big difference over time.
2. Gradually Increase Intensity
Don’t rush it.
Gradually increasing intensity helps prevent injury and promotes steady progress.
- Increasing Resistance: Start with lighter resistance bands or weights. As you get stronger, move to heavier ones.
- Adding More Repetitions: Begin with a manageable number of reps. Increase them as the exercises become easier.
3. Maintain a Balanced Diet and Hydration
Exercise alone isn’t enough. A balanced diet fuels your body, and hydration keeps your muscles working efficiently.
4. Prioritize Rest and Recovery
Your muscles need time to repair and grow.
Don’t underestimate the power of rest days, as they play a vital role in enhancing muscle recovery and optimizing overall performance.
Safety Precautions for Perfect Side Leg Raises
Safety first. Always.
a) Listening to Your Body
Pay attention to how your body feels. Pushing through pain isn’t heroic – it’s risky.
- Recognize Signs of Overexertion: Pain, excessive fatigue, and prolonged soreness are red flags. If something feels wrong, stop.
- Modify Exercises if Needed: If a move hurts, modify it. For instance, reduce the range of motion or take a break.
b) Consult a Professional if you have Concerns
If you have existing conditions or injuries, consult a professional.
- Seeking Advice from a Fitness Trainer: They can provide personalized guidance and adjustments.
- Medical Clearance: If you have health concerns, get a thumbs-up from your doctor before starting new exercises.
How to Do Side Leg Raises: Your Top FAQs Answered
Now, let’s address some commonly asked questions on how to do side leg raises, so you can perform them with confidence and get the best results.
1. How often should I do side leg raises?
You should do side leg raises 3 to 4 times a week. Consistency is key to seeing results and building muscle.
2. Can I do side leg raises every day?
Yes, you can do side leg raises every day, but it’s important to listen to your body. Ensure you’re not overexerting yourself and allow time for muscle recovery.
3. How many repetitions of side leg raises should I start with?
You should start with 2 to 3 sets of 12 to 15 repetitions. As your strength improves, gradually add more sets and repetitions.
4. Can side leg raises help reduce thigh fat?
Yes, side leg raises can help reduce thigh fat by toning the muscles and improving overall leg strength. However, they should be combined with cardio and a balanced diet for best results.
5. How long does it take to see results from side leg raises?
It takes about 4 to 6 weeks to start seeing noticeable results from side leg raises. This timeframe can vary based on your consistency and overall fitness level.
6. Can I use ankle weights during side leg raises?
Yes, you can use ankle weights during side leg raises to increase the intensity. Start with light weights to avoid strain and gradually increase as you build strength.
7. Are side leg raises good for hip pain?
Yes, side leg raises can be good for hip pain as they strengthen the hip muscles and improve stability. However, if you feel any discomfort, it’s best to seek advice from a healthcare professional.
8. Can side leg raises improve balance?
Yes, side leg raises can improve balance by strengthening the muscles around your hips and core. This helps in maintaining stability during various activities.
9. Do I need a warm-up before doing side leg raises?
Yes, you need a warm-up before doing side leg raises to prepare your muscles and reduce the risk of injury. Light cardio and dynamic stretches are effective warm-up exercises.
10. Can side leg raises help with cellulite reduction?
Yes, side leg raises can help with cellulite reduction by toning and firming the thigh muscles. Combining them with a healthy diet and regular cardio exercise enhances results.
Ready to Transform Your Thighs with Side Leg Raises?
Feeling a bit overwhelmed or skeptical? Maybe you’re thinking, “Can I really get those toned thighs I’ve always wanted?” Absolutely, you can!
It’s natural to have doubts, but remember, everyone starts somewhere.
Those seven moves we’ve outlined aren’t just exercises – they’re game-changers.
Imagine looking in the mirror and seeing defined, strong thighs staring back at you. The hard work, the consistency, it all pays off.
You’re not just sculpting your legs; you’re boosting your confidence, enhancing your balance, and improving your overall fitness.
So, dive into this journey with enthusiasm. Embrace the burn, cherish the progress, and celebrate every milestone.
You’ve got the tools, the knowledge, and the determination. Now, it’s time to put your plan into motion.
Go ahead, give it your all, and watch your thighs transform into the powerful, toned muscles you’ve dreamed of.
You’ve got this!